

I'm
starting to feel a little bored with the more "traditional" macaron
flavours. I've sussed out how to make the standard flavours you see everywhere
- vanilla, pistachio, rosewater, lemon, etc, but of the things I LOVE about
macarons is that the flavour options are endless! (Some of Adriano
Zumbo's macaron craziness includes vegemite macarons, lemon and olive oil, and
even cheeseburger!) Yesterday I decided I would take a break from the
traditional and start experimenting with the most marvelous and exciting
flavour combinations I could think of. In true teacher-style, I started a
brainstorm, listing all the wonderful flavours I want to experiment with.
Some of the flavour combinations on my "to try" list include:
Malteaser, gingerbread, bacon and maple syrup, champagne, brie and cranberry,
peanut butter and honey, raspberry cheesecake and caramelised onion. I'm
not sure how long it will take me to get to all of them (if ever), but I made a
start today by trying Tim Tam Macarons.

And that's where things started to
go wrong.
I've always had trouble with
chocolate macarons. Right from when I began my macaron obsession I could
never figure out why things always went wrong when cocoa was involved. I
was already off to a bad start when I realised I forgotten to compensate for
the extra dry ingredients that come from adding cocoa. Usually I’d combine 300g of almond meal with
300g icing sugar, but chocolate macarons need 60g cocoa, which means you only
mix 270g of both almond meal and icing sugar.
Fortunately I realised in time and removed 60g of my almond/icing sugar
mix and added in the cocoa, but even still, my batter was lumpy and
grainy. I worked the batter for an extra
long time to make it as runny and smooth as I could without over-working it, and
things were looking good when I piped it onto the trays. I think the cocoa must affect the way the dry
ingredients absorb and mix in with the wet, because after I’d piped the batter
the onto the trays and left them to rest, the macarons needed way less time to
form their skin than they usually do.
This is possibly another reason as to why they went wrong.

Anyhoo,
things weren’t looking too bad until I put the trays in the oven. The macarons still rose and had lovely feet,
but the tops weren’t smooth at all. The colour
went all blotchy and, although none of them cracked, the tops were wrinkled and
ugly. The shells were also far too
soft. I kept them in the oven for
another few minutes, but even so, they just weren’t cooking properly. I was left with a batch of blotchy, deflated,
wrinkly, soft macarons that can do one of two things: they can either crush all
your hopes and desires to ever make macarons again, or they can inspire and
empower you to try, try, try again until you get it right.
I
defaulted to the first option. I went through
the seven stages of grieving over a failed baking attempt, and then managed to
gain some perspective and decided that, hey, they still taste good, they’re
more than salvageable, and I’m still dying to try out my idea for Tim Tam
Buttercream. So, with high spirits, I
went on to making the filling.

And
SUCCESS! The filling was a-ma-zing! B was eating it by the spoonful. It was my first attempt at making Swiss
Meringue Buttercream, and I can see why so many people are choosing to use it
over regular buttercream. It’s much more
silky, smooth, and not as sickly-sweet as traditional buttercream. I flavoured it by adding finely ground Tim
Tams, and also added some roughly chopped Tim Tams for added texture. This buttercream is the saving grace for my
failed macaron shells. It looks and
tastes lovely, and the flavour of the Tim Tams comes through beautifully – not too
intense, but it’s undeniably there.
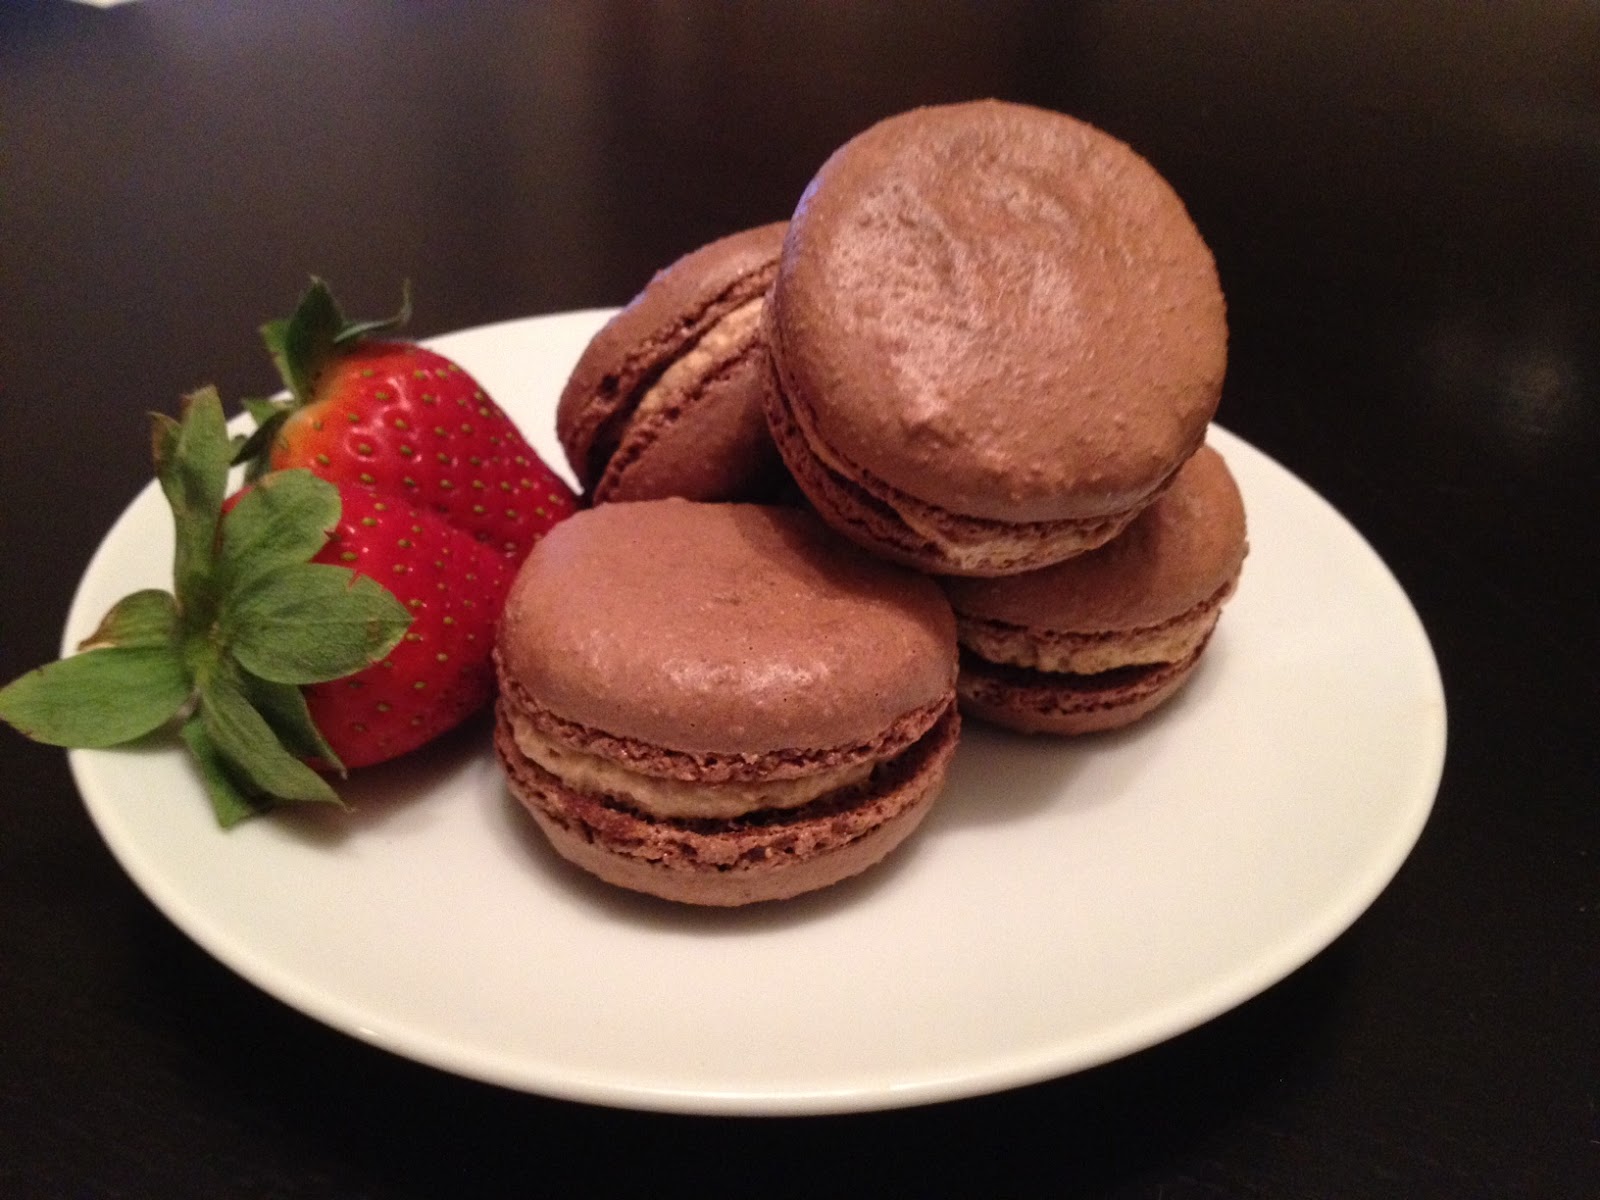
I scrutinised
the batch to find the most picture-worthy macarons to photograph, and these
were the best I could come up with. I
also photographed the steps I took to make them, so maybe someone can spot
where it all went wrong!
Hopefully
you will have more luck with them than I did!
To make chocolate macaron shells:
Makes about 50 macarons
270g
sifted almond meal*
270g
sifted pure icing sugar
60g
sifted cocoa powder
110g aged egg whites (egg whites left on the bench for a
few days)
110g extra egg whites, at room temperature
300g
caster sugar
75g water
*Almond
meal must be sifted through a very
fine sieve. I use a splatter guard
placed over a bowl, and rub the almond meal with my hands until I have sifted
enough. Weigh the almond meal after you have sifted it, not before, as
you will end up throwing out the grains that are too coarse to fit through the
sieve.

Line 4
baking trays with baking paper. Combine
sifted almond meal, icing sugar and cocoa powder in a large bowl. Place aged eggwhites in the bowl of your
mixer (making sure the bowl is very clean and has the whisk attachment in place). Combine caster sugar and water in a saucepan
over low heat. Gently stir until the
sugar dissolves (to check if the sugar is ready, rub some between your
fingers. If you can feel the granules,
it’s not dissolved yet.) While the sugar
is dissolving, turn the mixer on low speed to break up the egg whites. Once the sugar has dissolved, increase the
heat and bring to the boil and increase the mixer speed to medium. Allow the sugar-water to boil until mixture
reaches 118oC. Carefully pour
the sugar mixture into the mixer bowl as the eggwhites are being whisked. Pour down the side of the bowl rather than
over the whisk to prevent spun sugar.
Increase the speed to high and whisk for about 8 minutes. In the meantime, use a spatula to combine the
other eggwhites and the dry mixture.
Keep mixing until a paste forms.
When the eggwhites are thick and glossy, add them to the almond paste a
bit at a time.

Once all the eggwhite has
been combined with the almond paste, fold the mixture with a spatula until it
is a wobbly, hommus-like texture (try lifting the spatula out of the batter –
if the batter slowly falls off the spatula, it’s the right texture). Attach a 12mm nozzle to a piping bag and pipe
circles of the batter. I like to use a
template under my baking paper. The best
way to pipe is to hold the piping bag perpendicular to the tray, about 2cm
above the surface. Pipe until the batter
fills the template, then quickly move the nozzle to the top of the circle, then
do a little swirly motion to bring the nozzle down to the bottom of the
circle. This prevents your macarons from
have pointy tops and keeps them nice and smooth. Once all your batter has been piped, turn the
oven on to 130oC and leave your trays somewhere to rest. After about 20 minutes, check to see whether
a skin has formed on the macarons (gently touch one of the macarons – if you
can caress it without the batter going onto your fingers, then they’re ready
for the oven). Bake for 16 minutes. I like to bake one tray at a time, because my
oven is a bit dodgy, but all ovens are different so you just have to experiment
and see what works with your oven. After
16 minutes, remove the trays from the oven.
Let them sit for two minutes, then try removing a macaron from the tray
using a spatula. If it comes off easily,
your macarons are done! If not, put them
back in the oven for 2 minutes then try again.
Allow macarons to cool completely before piping.
To make Tim Tam Buttercream:
 2
egg whites
2
egg whites
½ cup
caster sugar
150g unsalted
butter, cubed and softened
8 Tim
Tams finely ground in a food processor
3 Tim Tams,
chopped
Place the
egg whites and caster sugar in a heat-proof bowl and whisk together. Place the bowl over a saucepan of boiling
water and continue to whisk until the mixture reaches 60oC. Place the eggwhites and sugar into a mixer
and whisk on high speed for 5 minutes. Add
the butter to the mixture, a few cubes at a time. Wait for the butter to incorporate into the
mixture before adding the next lot. If
the buttercream becomes soft and runny, put it in the fridge for 10 minutes before adding the
remainder of the butter. Once all the
butter has incorporated into the icing, fold in the ground and chopped Tim
Tam. Use a piping bag to fill the
macaron shells before sandwiching them together.
Store in
an airtight container in the fridge, taking them out half an hour before they’re
needed. Alternatively, store them in the
freezer for up to 3 or 4 months.
approx how many eggs is 110g egg whites?
ReplyDeleteFor the old egg whites I leave out 4 on the bench and a few days later it weighs just over 110g. For the new eggwhites I usually only need 3. If 3 isn't enough, I just make up the difference by adding the leftover old eggwhites. Hope that makes sense...
ReplyDelete